Hey guys! It's been a while since I last updated my blog. Since I have a free time, I have decided to give you guys another dungeon guide for the mission dungeon which is "Volcanic Citadel". It is located in Port Lux.
Dungeon Name: Volcanic Citadel (Mission Dungeon)
Level Requirement: 95 - 190 (Class Lv 10)
Entry Item: Seal of the Darkness
Reward DP: 3
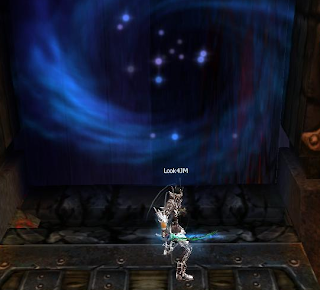
1.) Touch the first monument that you will see when you first enter the dungeon. Also, shown below. It will give you a quest to defeat the boss monster "Tiraff". Just follow the path forward to locate it.
2.) Defeat "Tiraff" to obtain "Tiraff's Jewel" (it will be useful later). Then talk to the stone monument near the location to open the close door.
3.) When the door opens, there are two ways to proceed.
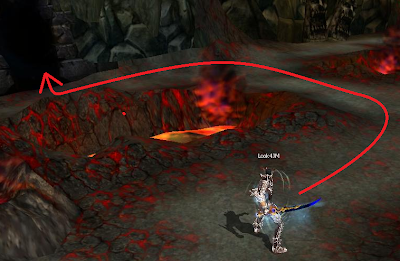
3.1.1) First path will be shown below, this path will give you an extra treasure chest by defeating a boss monster. If you're looking for more loots this path will be efficient to you. Now, when you enter turn left then turn on the first right that you will see then at the end of road you will see two cannons, destroy them. It is also shown on the map below.
3.1.3) After defeating the two cannons, a bridge will appear to connect to the center gate, destroy the center gate to reveal a portal. Enter it.
3.1.4) Once inside, you will encounter the boss monster "Karir". Defeat him for an extra treasure chest. Proceed to the portal and you will be ported on another room.
3.2.1) Here's the second path that you can take, this is much shorter but you won't gain an extra treasure chest. So, if you want to make a record on this dungeon I would suggest taking this path. After defeating "Tariff" and opened the gate, when you enter head straight and make a right turn on the second corner. Then you will see the boss monster "La Vestima" and obtain the "Fire Element".
3.2.2) After defeating the monster, make your way down the path until you see the image shown below. Make a left turn, you don't need to destroy the cannons. Enter the portal.
3.2.3) Once inside, you need to use your "Dash + Fade Step" skill combo to walk through the lava. You will receive damage when you step on it. Then exit on the portal in the end.
3.2.4) Make your way to the sliding doors, just wait for a moment until they open then proceed.
4.) After choosing which of the two paths you want to take. You will encounter the next boss monster which is "Jakrr", defeat it to open the close gate. Reminder: The treasure chest of this monster will appear on the close box near it. You may destroy the mirror gate or you can just use an AOE skill to obtain the loot.
5.) After defeating "Jakrr". Move up to locate the monster "Volcanic Freezen Guard", defeat it.
6.) After defeating "Volcanic Freezen Guard", a secret door will open which will reveal another boss monster which is "Bricry" defeat it for a treasure chest.
7.) After that, take a right then move up until you see the image below. Destroy the Huge Mirror Gate to make your way inside.
8.) Defeat the Dark Phalanxes until the boss monster "Pakss" appears then defeat him.
9.) After that, touch the stone monument to receive the item "Pakss's Helm". Then the next gate will open.
10.) Make your way the path, until you see another Huge Mirror Gate, destroy it.
11.) Move up and make a left turn to locate another boss monster which is "Pasin". Defeat him to open the sliding gate behind him.
12.) When you enter you will see a huge monster at the center of the room. That is the final boss which is "Balrog" but you need to defeat first (4) four boss monsters to open the cage he's in. Let's go to the first boss, make a left and you will see an opening, enter the portal to locate the boss monster "Prasir".
13.) After defeating "Prasir" move out of the opening then just head straight up to locate the next opening, enter the portal, it's the lair of the second boss which is "Athberg".
14.) Just like the other boss's location, the third one is just located on the next corner. Enter the portal, to locate the third boss which is "Tarff".
15.) After defeating "Tarff" and went outside, touch the stone monument near the entrance. It will teleport you on the entrance when you first enter the room.
16.) Now, on to your left the closed gate has already open. There you will see the fourth boss which is "Tiarff". Reminder: Do not lure the monster outside of his room, dash inside and defeat him. Why? because once you defeat him the entrance will close again and his treasure chest will be drop inside. After defeating "Tiarff" touch the stone monument to exit his room and return to the center gate.
17.) Now that you have defeated all the boss monsters in this chamber (I call them Balrog's Minions). Touch the crystal monument in the center and follow the instructions shown below to open the cage of "Balrog".
18.) Once the force field around "Balrog" has disappeared move around for an entrance to enter the center platform. There will be a dialogue first for the final boss. When the word "WARNING" appears, you may now target "Balrog" and fight him.
19.) After defeating the final boss, move around and locate the stone monument shown below to exit the dungeon.
I hope I have helped you guys understand how to finish this dungeon. 'til next time. Oh! by the way, watch out for my next guide which will be for "Tower of the Undead B2F", it's the continuation of the "Tower of the Undead B1F". Also, here's the video I made when I took a run of this dungeon:


